
 English
  Italian
  French
  German
  Spanish
  Arabic
 A logo can look precise on a digital mockup and still disappoint on the finished bag. Dense embroidery may pull a lightweight panel out of shape. A printed logo may lose adhesion on a coated fabric. Fine lettering can close up in stitches, while a heat transfer can crack where the bag is folded.
That is why the embroidery vs. printing decision should be made with the bag material, artwork, structure, and expected use in view. Embroidery is often the stronger starting point for a compact, tactile brand mark. Printing gives much more freedom for large artwork, gradients, and full-color graphics. Neither is automatically the better method for every custom bag project.
1. Embroidery vs. printing: What is the main difference?
Embroidery builds a logo with thread. Printing places ink, dye, or a transferred graphic on or within the material. The first method changes the surface by adding stitches and backing. The second creates a flatter image, although the feel and thickness vary by process.
How embroidery is applied to custom bags
Before production, the artwork is digitized into a stitch file that tells the embroidery machine where to place each stitch, in what order, and at what density. Digitizing is more than converting one file format into another. A technician may need to widen thin lines, simplify small details, change the stitch direction, or add underlay so the finished logo stays readable.
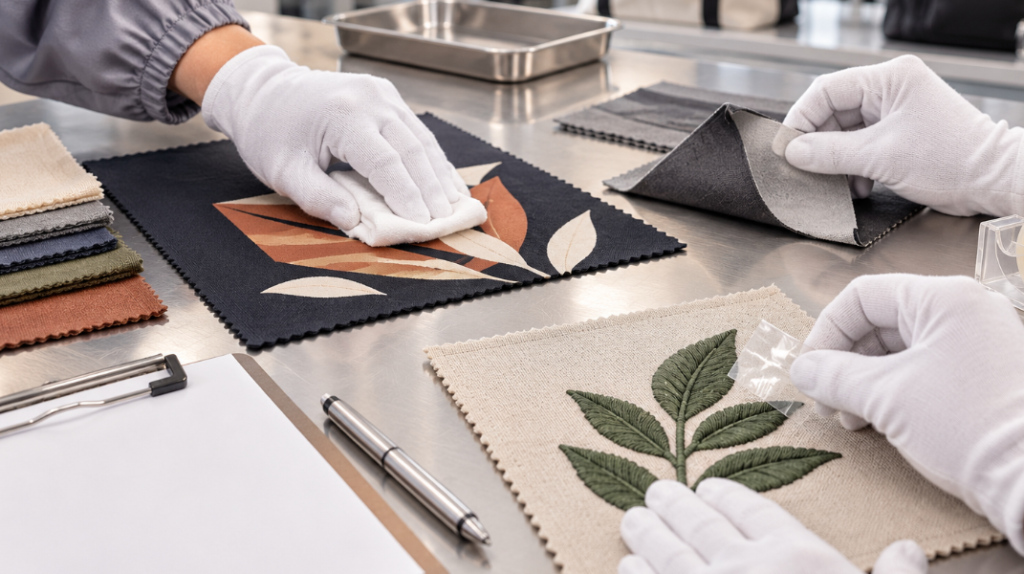
The panel is stabilized and held in position while the machine stitches the design. On a completed bag, the available space for hoops, frames, and machine heads may be limited by pockets, zippers, padding, or lining. For this reason, many embroidered logos are applied to a flat cut panel before the bag is sewn.
Common printing methods used for bags
“Printing” can refer to several processes, and they should not be compared as if they produce the same result:
| Printing method | Practical starting point | Main limitation to check |
|---|---|---|
| Screen printing | Bold artwork with one or a few solid colors | Each color requires separation, and fine results depend on the ink, mesh, curing, and fabric surface |
| Heat transfer | Detailed, multicolor logos on compatible fabrics | Heat, pressure, adhesive compatibility, folding, and edge lifting |
| Digital printing | Complex illustrations, many colors, and short or varied runs | Ink system, pretreatment, fabric color, and wash or rub performance |
| Sublimation printing | Full-color graphics on suitable polyester-based materials | Works best with compatible light-colored polyester or prepared substrates |
Screen printing pushes ink through a mesh stencil. Heat transfer applies a prepared image with controlled heat and pressure. Digital printing deposits ink directly onto the material, while sublimation turns dye into gas so it bonds with compatible polyester fibers. The correct choice begins with the exact material specification, not only the visual design.
Why neither method is better for every project
A small embroidered monogram can add depth to a premium canvas bag, yet the same technique may make a thin nylon pouch buckle. A screen-printed event graphic can cover a broad tote panel cleanly, but it will not recreate a photograph in the same way as digital or transfer printing. The better method is the one that reproduces the design without weakening the material, complicating assembly, or failing during use.
2. Which method produces the better logo appearance?
Appearance depends on how the logo is meant to be seen. A customer holding a retail bag at arm’s length notices different details from someone viewing a large campaign graphic across a room.
Embroidery for a textured and premium look
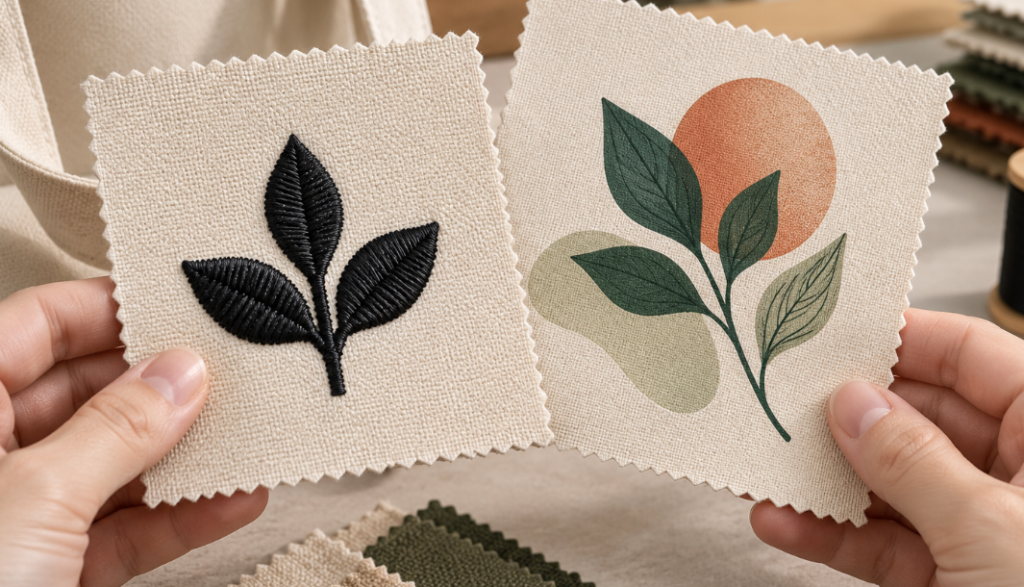
Embroidery gives letters and symbols a raised edge, visible thread direction, and a tactile finish. It usually works well for compact logos, initials, badges, and simple wordmarks on structured or medium-to-heavy fabrics. Thread can also catch light in a way that makes a restrained logo feel more substantial.
The artwork still needs to suit the process. Very small lettering, thin serifs, tight gaps, and dense internal details may close up when converted into stitches. Increasing stitch density is not always the solution because extra thread adds weight and pull. A good digitizing file balances coverage with the stability of the fabric.
Printing for large, detailed, or full-color artwork
Printing offers a broader graphic area without adding thousands of stitches. Screen printing is a strong option for large flat logos with solid colors. Digital and heat transfer methods handle gradients, shadows, photographic details, and complex illustrations more effectively. Sublimation can produce broad, vivid graphics when the fabric and construction are planned around the process.
Printed artwork can also preserve thin lines more easily, but the factory still needs a production-ready file and minimum line specifications for the selected process. A low-resolution image that looks acceptable on a laptop screen may show blurred edges at full print size.
How logo size and viewing distance affect the result
Small logos are judged at close range, so letter spacing, edge definition, and thread coverage matter. Large logos are often viewed from farther away, where overall contrast and proportion matter more than tiny details. A physical strike-off or embroidered swatch at the intended size provides better evidence than enlarging a digital mockup.
For a custom bag, the usable decoration area is smaller than the overall panel. Seams, gussets, handle roots, pockets, and edge allowances all reduce the safe area. The logo should be sized against the finished bag and its normal viewing position.
3. How bag material affects embroidery and printing
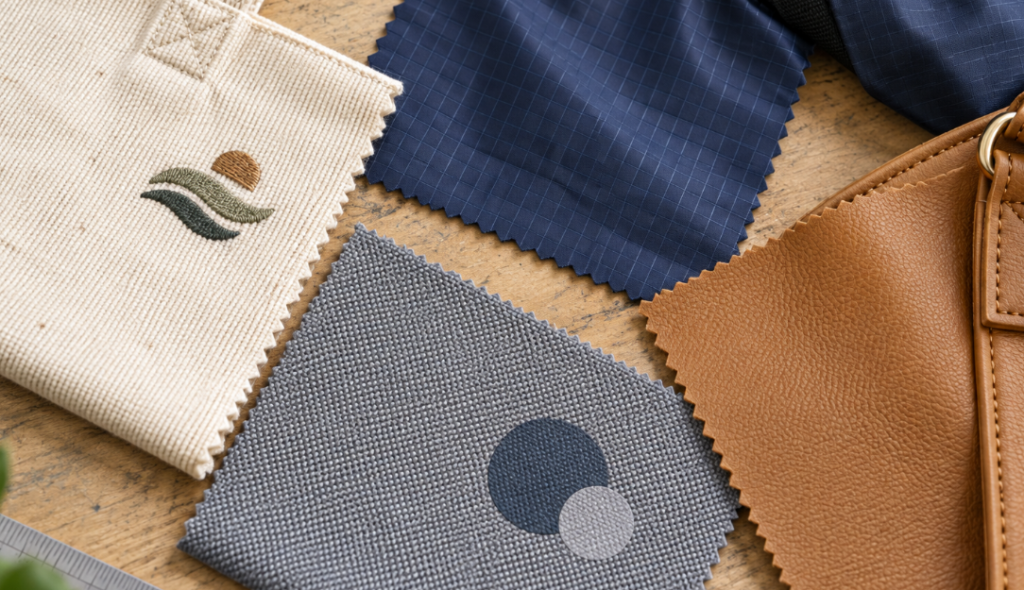
Material compatibility is where many attractive concepts either become reliable products or create avoidable defects. Buyers can review HeteBag’s custom tote bag materials and logo options for examples of commonly used fabrics, but the exact fabric weight, finish, and coating still need to be tested.
Canvas, cotton, and heavy woven fabrics
Canvas and heavier cotton fabrics usually provide a stable base for embroidery. They can also accept screen printing and some digital methods well. Even so, a dense embroidered area may pucker if the fabric is soft, loosely woven, or insufficiently stabilized. Ink coverage can vary on coarse canvas because the yarn texture creates an uneven surface.
For a premium canvas project, compare the print or embroidery on the actual production fabric after any washing, dyeing, or finishing. A natural cotton shade can also change the perceived color of light inks, especially when the print lacks an opaque underbase.
Nylon, polyester, and performance fabrics
Lightweight nylon and polyester require more caution. Dense embroidery can pull the panel, leave visible needle holes, or distort a water-resistant construction. A smaller design, lower stitch density, suitable backing, and careful needle selection may reduce the risk, but the sample should be inspected from both sides.
Printing performance depends on the fiber, coating, and ink or adhesive system. Some water-repellent finishes reduce adhesion. High heat can mark, shrink, glaze, or distort a sensitive fabric. Dye migration from dark polyester may also discolor a light transfer or ink layer. A supplier should test the actual fabric lot at the intended temperature and pressure rather than relying on a generic fabric name.
For functional products such as custom backpacks, the logo method should also respect waterproof panels, foam layers, reflective elements, and high-abrasion areas.
PU leather, coated fabrics, and delicate materials
Needle penetration can leave permanent holes in PU leather and may encourage cracking or peeling around a dense embroidered area. Heat transfer also needs caution because excess temperature or pressure can change the grain, gloss, color, or bond between surface layers. Depending on the material and brand direction, a woven label, patch, embossing, debossing, or metal logo may be safer than either direct embroidery or printing.
Construction matters just as much as the material. A pocket opening may be too narrow for a screen or embroidery frame. A zipper can prevent the panel from lying flat, and a lining may be accidentally stitched through. When artwork crosses a seam, pocket, or curved section, decoration usually needs to happen on the cut panels before assembly. The approved sample should record that production sequence.
4. Durability, cleaning, and long-term logo performance
Embroidery has a strong reputation for durability, but it does not fail in the same way as print. Thread can snag, break, fuzz, or loosen. Poor backing can rub against the contents or user, and dense stitching can continue to stress a lightweight panel.
Printed logos have their own failure patterns. Screen ink can crack or release if the ink, curing conditions, and surface treatment do not match. A heat transfer may lift at the edges or split after repeated folding and abrasion. Digital print performance depends on the ink chemistry, pretreatment, curing, and fabric. Sublimation avoids a raised film because the dye enters compatible fibers, although color and substrate selection still limit the process.
Testing the decoration before bulk production
The test plan should reflect the way the bag will be used. A retail handbag may need abrasion and color-transfer checks, while a washable cotton tote also needs a cleaning test. Useful pre-production checks include:
- Dry and wet rubbing on the decorated area to check color transfer and surface wear
- Repeated folding along the likely packing lines to reveal cracking or edge lifting
- Tape adhesion checks for a printed layer, using an agreed method suitable for the material
- Cleaning or laundering according to the proposed care instructions
- Color migration checks on dark polyester or coated fabric
- Visual inspection for puckering, needle damage, loose thread, distorted lettering, and backing exposure
AATCC TM8 provides a controlled method for assessing color transferred from textiles through rubbing. If the bag is intended to be washed, ISO 105-C06 is one recognized reference for textile colorfastness to laundering. The buyer and supplier should agree on the relevant method, number of cycles, acceptance grade, and care conditions before bulk production.
5. How design complexity, colors, and placement change the choice
Simple one-color logos can work in embroidery or screen printing. The decision then rests on the desired texture, logo size, fabric, and product position. Gradients, soft shadows, photographs, and complex illustrations generally point toward digital printing, heat transfer, or sublimation on a compatible substrate.
Oversized embroidery is rarely the best starting point. A large filled area increases stitch count, weight, production time, stiffness, and the risk of panel distortion. If a brand wants embroidery at a larger scale, an open design with more negative space may work better than a dense filled block.
Placement can rule out a method that looks suitable on paper. Logos crossing seams or wrapping around curved structures require precise panel planning. Artwork near a zipper, pocket edge, or handle attachment needs a clear production tolerance. In many projects, the print or embroidery should be completed before sewing, which means the factory must control panel orientation and alignment during assembly.
The approval sheet should state the finished logo width and height, distance from fixed seams or edges, orientation, color reference, process, and allowed positional tolerance. “Centered on front” is too vague when the panel includes an offset pocket or asymmetric construction.
6. Embroidery vs. printing for different custom bag projects
The following choices are starting points, not automatic specifications:
| Custom bag project | More suitable starting option | What to confirm in the sample |
|---|---|---|
| Promotional tote bags | Screen printing | Ink coverage, curing, placement, and rub resistance |
| Premium canvas bags | Embroidery or high-quality printing | Puckering, reverse-side finish, surface texture, and brand color |
| Fashion and private label bags | Embroidery, woven label, or combined branding | Material damage, proportion, hardware coordination, and retail finish |
| Full-color cosmetic bags | Heat transfer or digital printing | Heat marks, folding, edge adhesion, and color accuracy |
| Lightweight drawstring bags | Printing | Coating compatibility, drawcord-area clearance, and fabric distortion |
| Backpacks and outdoor bags | Embroidery, transfer logo, or patch | Abrasion area, waterproof layer, foam, lining, and machine access |
| Large campaign artwork | Screen or digital printing | Usable panel area, resolution, color separation, and seam alignment |
A custom makeup bag with a coated shell and narrow curved panels has different constraints from an unlined cotton tote. Two bags that use “polyester” may also require different decoration methods because their denier, weave, coating, lamination, and construction are not the same.
7. How to choose the right method before bulk production
Send the factory the correct artwork and bag specifications
A useful RFQ gives the supplier enough information to assess the process rather than guess. Include:
- Bag type, finished dimensions, and construction drawing or reference photos
- Fabric composition, weight or denier, color, coating, and surface finish
- Vector logo file in AI, EPS, or vector PDF format
- Finished logo dimensions and exact placement
- Pantone reference for print or preferred thread color reference
- Order quantity and color breakdown
- Intended use, expected abrasion, and cleaning requirements
- Labeling, packing, barcode, and carton requirements
Embroidery also needs an approved digitized stitch file, while screen printing requires color separation and suitable artwork. The factory can prepare these production files, but the buyer should approve the result on the correct material.
Compare physical samples instead of digital mockups
A mockup helps with proportion and communication. It cannot show thread buildup, puckering, ink hand feel, gloss change, heat marks, coating reaction, or color migration. Ask for a strike-off, embroidered swatch, or complete sample made with the proposed fabric and logo process.
View it under normal indoor light and, when brand color is sensitive, under an agreed light source. Bend and rub the decorated area. Pack the bag as intended and check whether folds pass through the artwork. Inspect the reverse side to see backing, penetration, and any contact points that may affect the lining or contents.
Approve a golden sample and set QC standards
Once the decoration and bag construction are correct, sign and date a golden sample or sealed approval sample. The production specification should record logo size, color, placement measurements, process, stitch or print appearance, and acceptable tolerance. Keep approved artwork and color references under version control so an outdated file cannot reach bulk production.
Inline inspection should check the decoration before too many panels are assembled. Final inspection should compare random finished bags with the golden sample and packing specification. This sequence catches placement drift, thread-color changes, print contamination, curing problems, and assembly errors while correction is still practical.
8. Conclusion
Embroidery is usually the better starting point for compact logos that need texture, depth, and a premium finish on stable materials. Printing is more flexible for large artwork, multiple colors, gradients, photographs, and lightweight constructions. Within printing, screen printing, heat transfer, digital printing, and sublimation each have different material and artwork requirements.
The final choice should follow the actual fabric, logo file, placement, construction sequence, expected use, and physical sample. A method that performs well on heavy canvas may damage thin nylon or PU. Approving a tested golden sample is more reliable than choosing from a generic embroidery vs. printing comparison.
Frequently asked questions
Can the same logo file be used for embroidery and printing?
The vector artwork can be the common source, but production files differ. Embroidery requires digitizing into stitches, including stitch type, density, direction, and sequence. Printing may require color separation, an underbase, a transfer file, or a raster image at the correct resolution and size.
Is embroidery always more durable than printing on bags?
No. Well-made embroidery can last a long time, but thread may snag or loosen and dense stitching may damage a light fabric. A properly matched and cured print can also perform well. Durability depends on material compatibility, workmanship, use, cleaning, and an agreed test standard.
Which method is better for very small text?
Printing often preserves very small text and fine lines better. Embroidery has minimum practical line and letter sizes that vary with the font, thread, fabric, and digitizing. The factory should produce the design at actual size before approval. Sometimes simplifying the wording or increasing the logo size gives a cleaner result.
Should the logo be applied before or after the bag is sewn?
Flat-panel decoration before sewing is common when the completed bag has restricted machine access or the design sits near pockets, seams, curves, padding, or lining. Simple logos on accessible tote panels may be applied after assembly. The factory should decide the sequence during sampling and record it in the production specification.


